Damp Quarry Tiled Church Floor Restored in Cowbridge
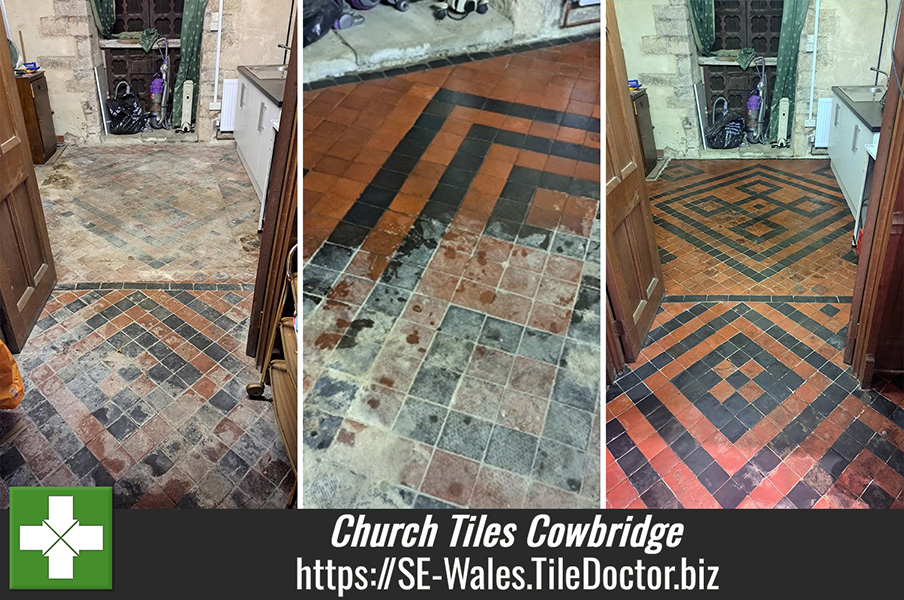
Tile Doctor was approached by an architect, overseeing restoration work at a church in the rural town of Cowbridge just outside Cardiff in the Vale of Glamorgan. The project included the restoration of a 25mm thick Quarry tiled floor that was worse for wear. The original church which dated back to the 11th century, and a small extension had been added in the early 19th century.
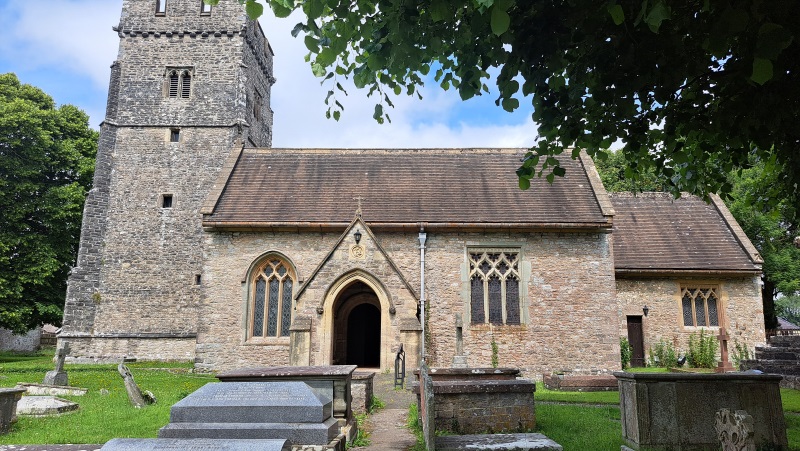
I contacted the architect who was overseeing the work to arrange a date to visit the church and survey the floor. Older floors installed before the invention of the damp proof membranes and can suffer from damp issues and will be problematic due to age and wear of the tiles especially in public areas such as churches. As a result, it’s very difficult to provide a quote over the phone from photographs so I do need to see the floor in person and run a few tests.
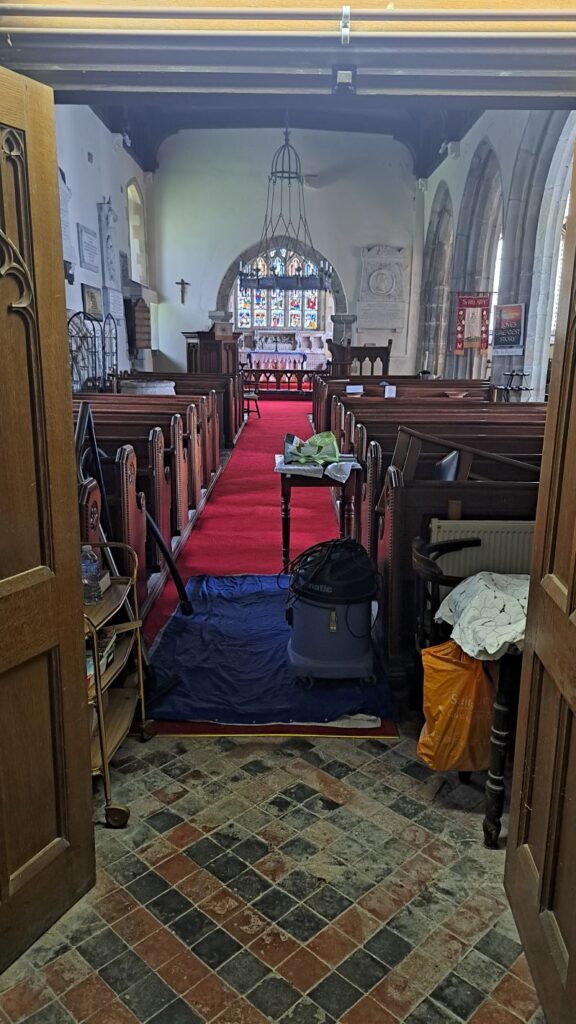
The floor had three layers of carpet covering the tiled area and after lifting the carpet at the four corners I could see damp issues seeping through to the surface of the floor which had created hard crystallisation. The coverings were clearly preventing moisture for evaporating at the surface and if left unchecked would cause damage to the tile. Once the floor was fully exposed, I was able to get a good idea of what the level of work would involve.
 |
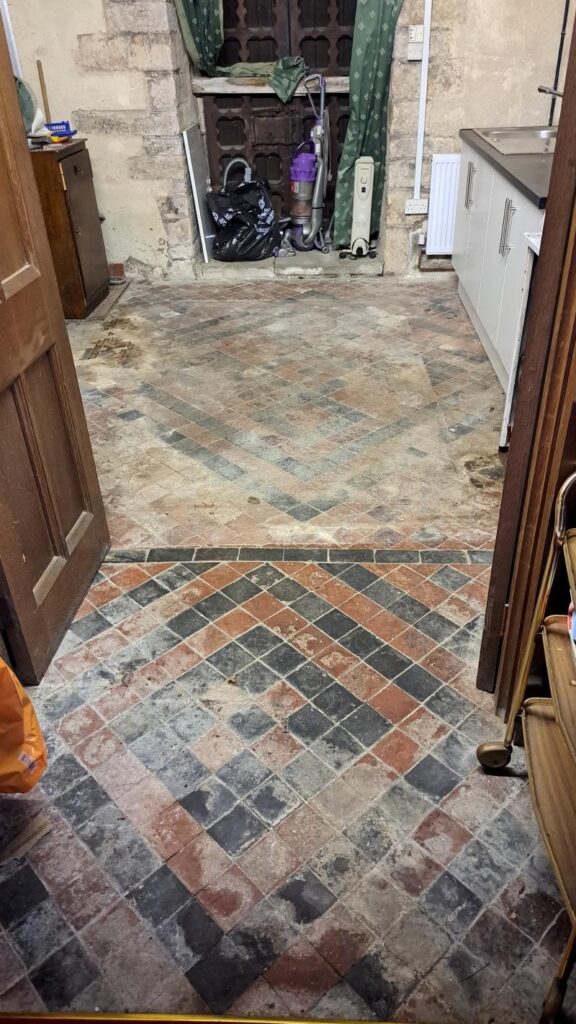 |
Having worked on similar churches floors in the past in other I was able to speak from experience and explained to the architect what could be achieved due to the state of the floor. This was based on the age of the floor and the extent of the staining and so I set the expectation that the final finish would be good but not perfect. He accepted that it would be unrealistic to expect a perfect result and was happy for me to do my best.
I provided a detailed quote for the restoration of the floor which was accepted and a date set for the work to start.
Restorative Cleaning of a Quarry Tiled Church Floor
The restoration work began by carefully scraping off as much of the crystallisation as possible with a sharp bladed hand tool. Then neat Tile Doctor Pro-Clean was applied to the tiles working in one square meter sections at a time scrubbing it in with a coarse handheld brush. The section was then rinsed with water and the soiling extracted with a wet vacuum as the work progressed. In total two litres of Tile Doctor Pro-Clean were used in the cleaning.
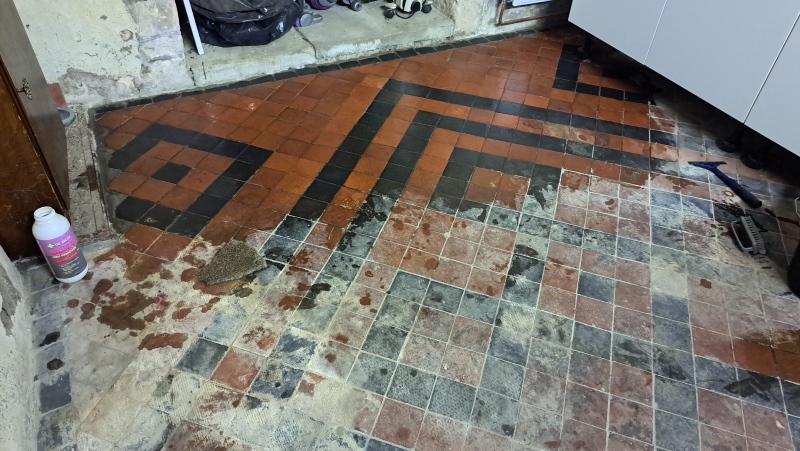
Once the whole floor had been scrubbed and rinsed it was treated to an acid wash using Tile Doctor Grout Clean-up. This process will help to dissolve the crystallisation and latent salts in the tile to stop the appearance of efflorescence as the floor dries. This process was applied at least three times as the crystallisation was difficult to remove, in total three litres of Tile Doctor Grout Clean-up was used to do this.
The floor was finally rinsed with Tile Doctor Neutral Tile Cleaner to remove any cleaning products and then given a vacuum to remove as much moisture as possible.
Sealing a Quarry Tiled Church Floor
I returned three days later to check for moisture in the floor using a damp meter which proved to be border line. I decided to go ahead and seal the floor after drying the tiles further with a heat gun.
The chosen sealer was Tile Doctor Colour Grow which is a durable breathable colour enhancing impregnator which will cope well with future damp issues once cured. Two coats were applied and a one litre tin proved to be sufficient. Colour Grow is a hard-wearing impregnator that soaks into the pores of the Quarry tiles preventing dirt from becoming ingrained there and ensuring it remains on the surface where it can be easily cleaned away.
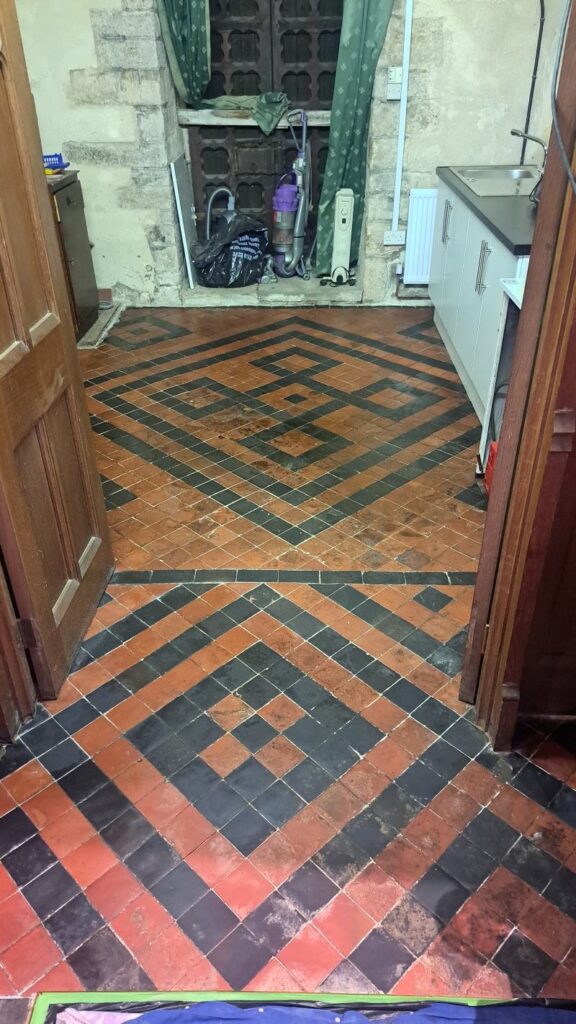
Once complete the floor was looking in a much better condition after all the hard work involved and the congregation were delighted with the results.
For the aftercare of sealed tiles floors I recommend they use of Tile Doctor Neutral Tile Cleaner which is a gentle but effective tile cleaner that won’t impact the sealer which can be the problem with the stronger products.
Professional Restoration of a Quarry Tiled Church Floor in Southeast Wales
Damp Quarry Tiled Church Floor Restored in Cowbridge Read More »

