Southeast Wales

Terrazzo Floor Restoration Penarth

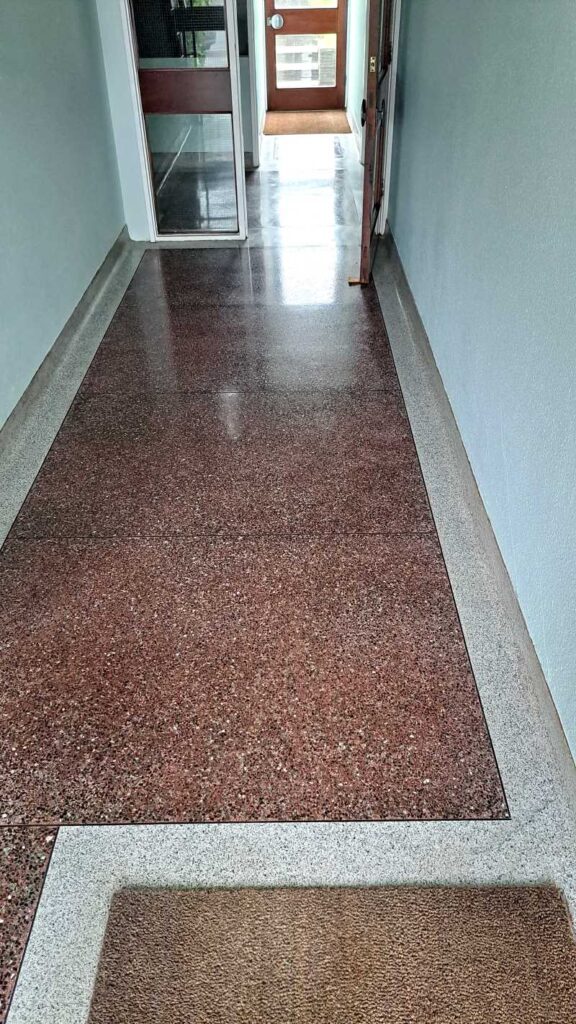
Cracked Terrazzo Tiled Communal Hallway Floor Restored in Penarth

Earlier this year we were contacted by a property management company regarding the restoration of a terrazzo floor in the communal entrance hallway of a block of flats they managed in Penarth. The floor had several cracks and after reviewing some similar work published on my website, they were confident we could achieve a good result.

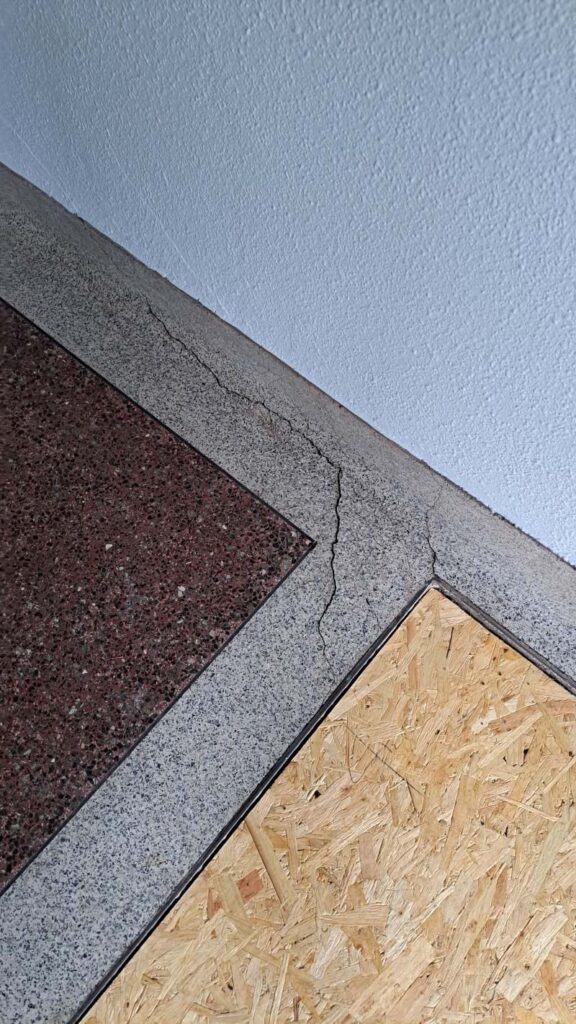
Terrazzo Floor Before Restoration Penarth Terrazzo Floor Before Restoration Penarth

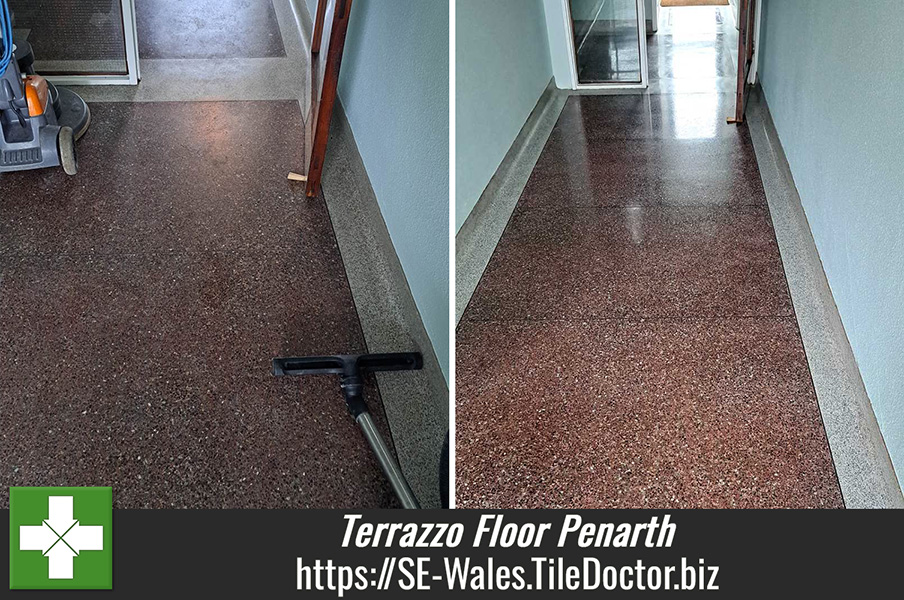
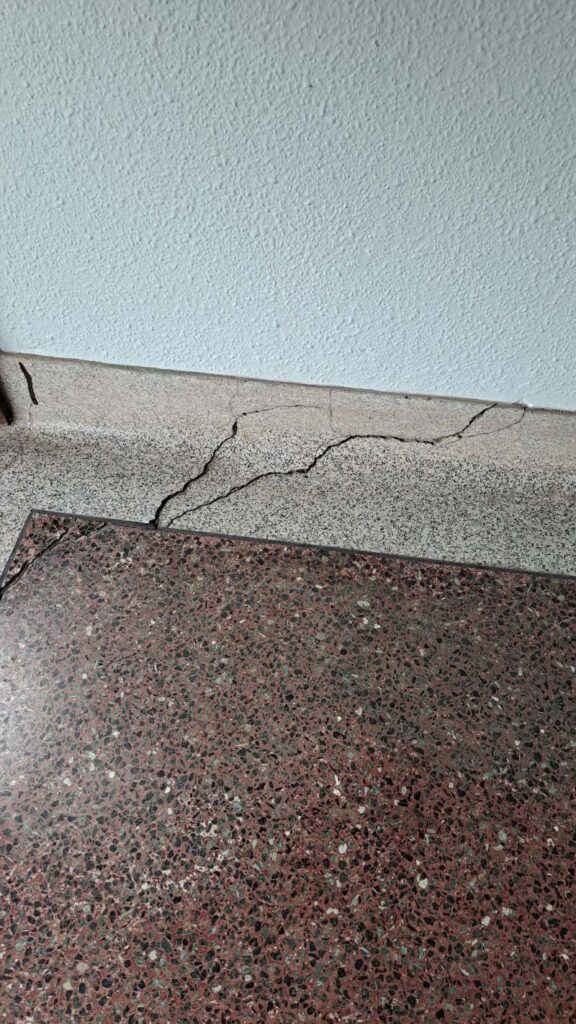
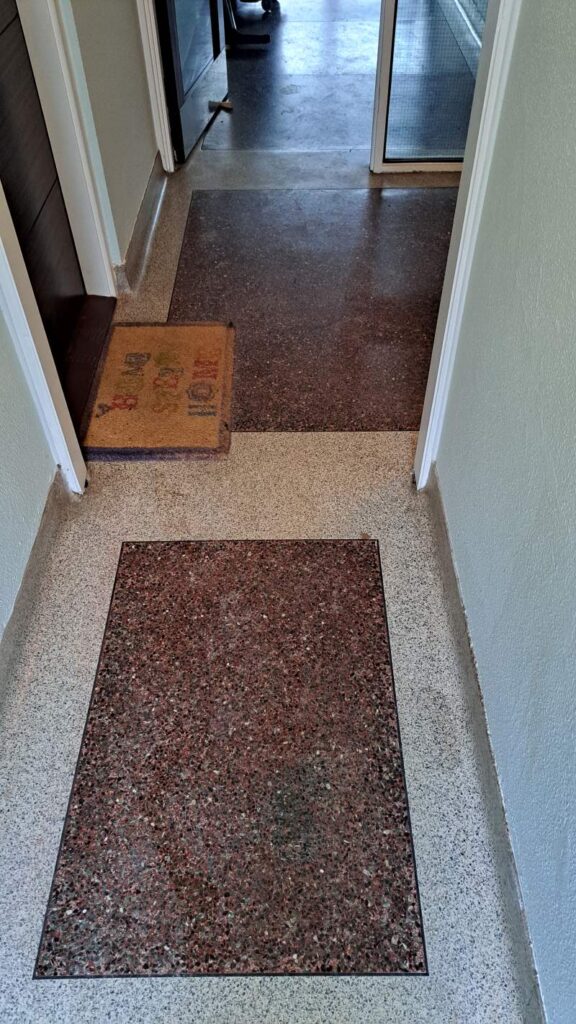
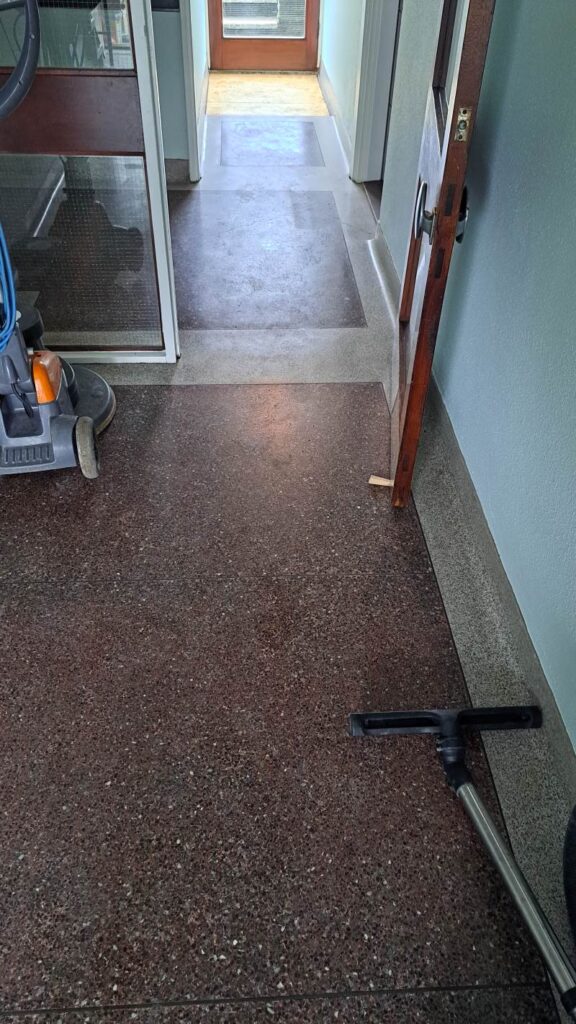
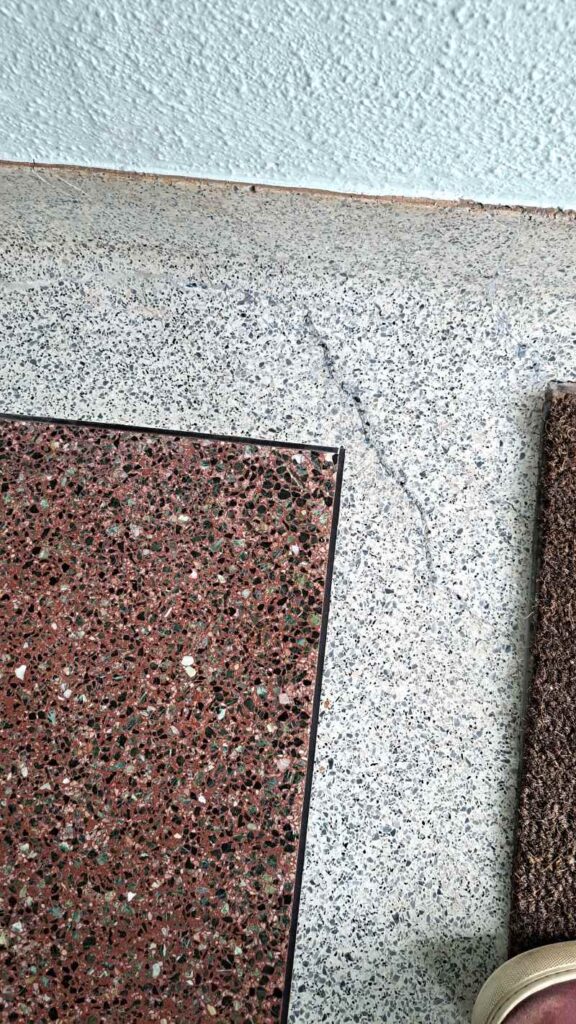
Happy to oblige I scheduled a time with the managing agent to survey the floor and create a quote for its restoration. Dirt was badly ingrained into the stone, and it was clear it had been some time since it was last professionally cleaned and sealed. Terrazzo needs to be sealed to prevent dirt from becoming ingrained in the floor and in this case the sealer had worn down and was no longer providing any protection. The other issue were the cracks which is not uncommon in an old floor like this that has seen some settlement.

Terrazzo Floor Before Restoration Penarth Terrazzo Floor Before Restoration Penarth

Later that day I worked out a quote and emailed it over to the agent who gave me the go-ahead to restore the floor.

Cleaning and Repairing a Terrazzo Tiled Communal Entrance Hallway

I had to work in sections so as not to impede access for the residents and started by addressing the cracks. After clearing out the crack it is filled with a specialist product which is coloured to match. It is then touched up carefully with paint to blend in the repair.

Once dry, work progressed onto burnishing the floor using a set of Tile Doctor Burnishing Pads. The process starts with a coarse 400-grit pad which removes any remaining old sealer and light scratch marks. The pad is run over the floor three or four times and then the soiling generated by the process is rinsed off with water and extracted with a wet vacuum. This is then repeated with a medium 800-grit pad which smooths the surface after the coarse 400-grit pad and is the first stage in polishing the floor. After another rinse and extraction, the pad was changed for a finer 1500-grit pad which further polishes the floor.

The last pad is a very fine 3500-grit which is run over the floor dry with only a little water sprayed onto the surface. This last pad adds the final polish to the floor and really brings up the surface and produces a lovely satin shine finish.

Sealing a Terrazzo Tiled Communal Entrance Hallway

The floor was left to dry overnight ready to be sealed the following day. The hallway would see a lot of foot traffic, so I chose a hard-wearing impregnator to seal the floor. The product being Tile Doctor Colour Grow which soaks into the surface adding protection from within, it also contains a colour enhancer that improves the natural colours in the Terrazzo.

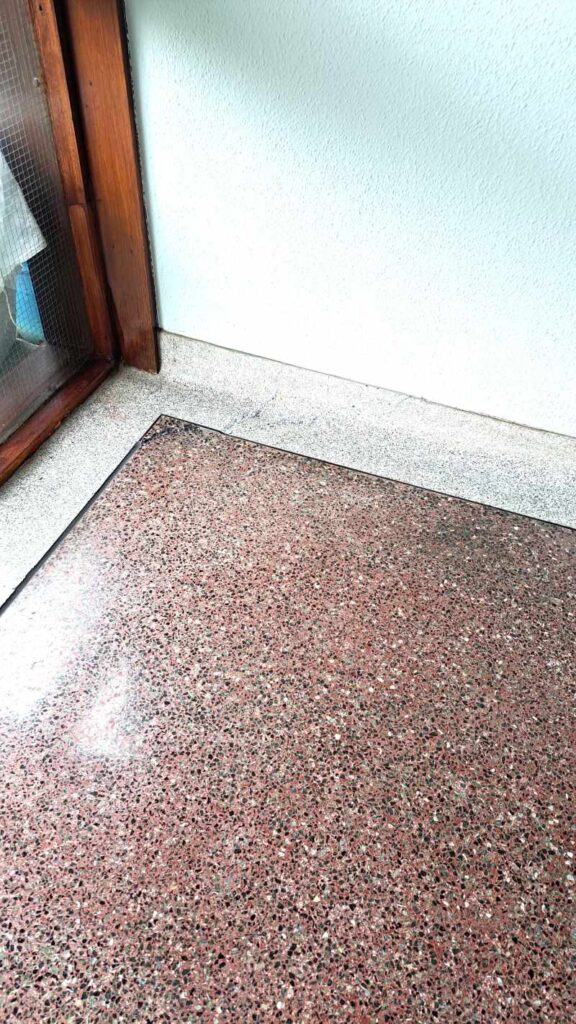
Terrazzo Floor After Restoration Penarth Terrazzo Floor After Restoration Penarth

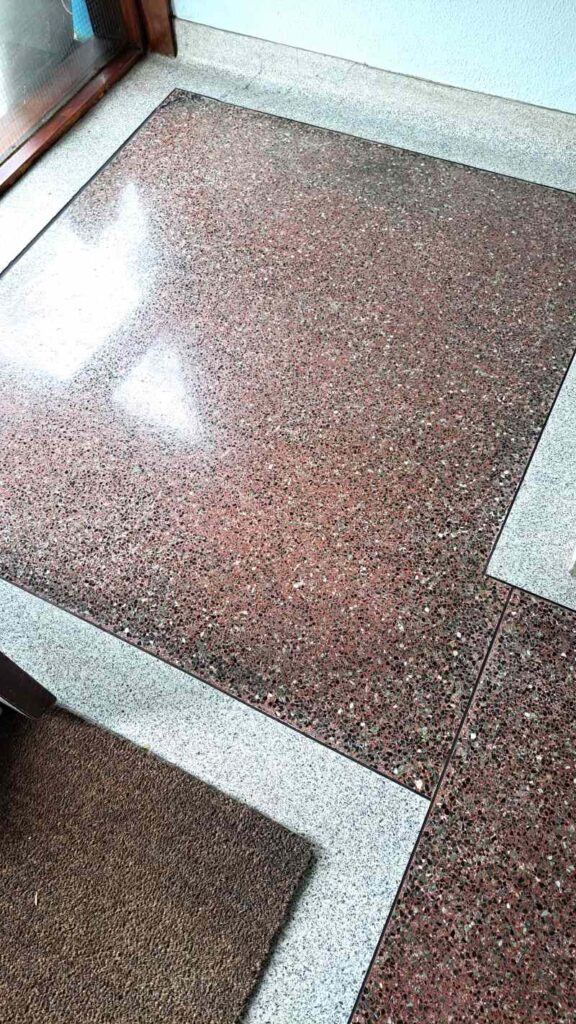
The result was a much cleaner and easier to service floor, the sealer also helped the crack repairs to blend in and overall the hallway looked much healthier.

For the regular cleaning for a sealed floor like this I recommend using a Tile Doctor’s Neutral Tile Cleaner which is a mild yet effective product that won’t impact the sealer. Using stronger bleach-based products will shorten the life of the sealer.

Terrazzo Floor After Restoration Penarth Terrazzo Floor After Restoration Penarth


Professional Restoration of a Terrazzo Tiled Communal Entrance Hallway in Southeast Wales

Cracked Terrazzo Tiled Communal Hallway Floor Restored in Penarth Read More »

Art Deco Encaustic Tiled Floor Restoration Cardiff

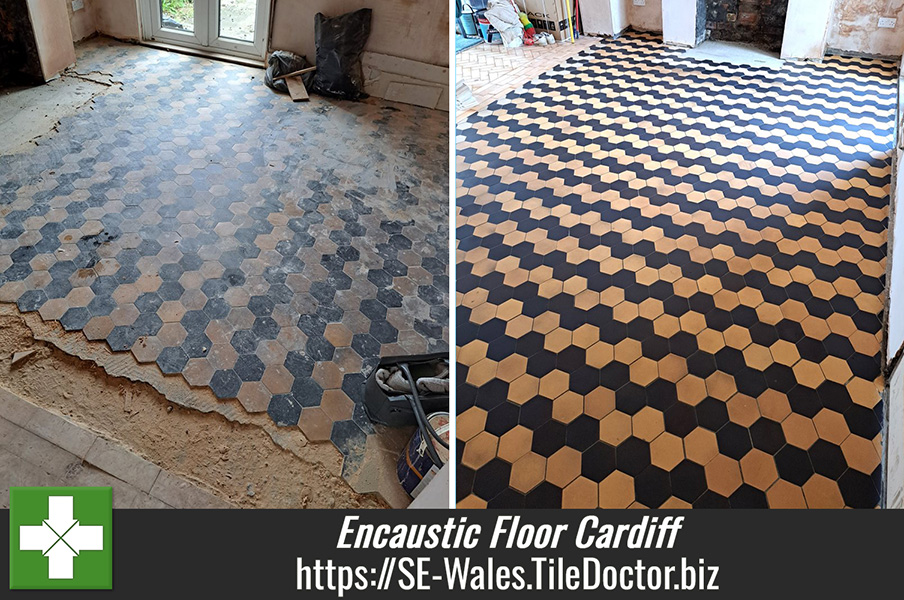
Damaged Art Deco Encaustic Cement Tiled Floor Fully Restored in Cardiff

Tile Doctor was contacted by a client who had recently purchased a 1920’s property in Cardiff with a Encaustic Tiled floor that was in a bad state. The property was having major building works carried out to bring it back to its original condition and this included the tiled floor.

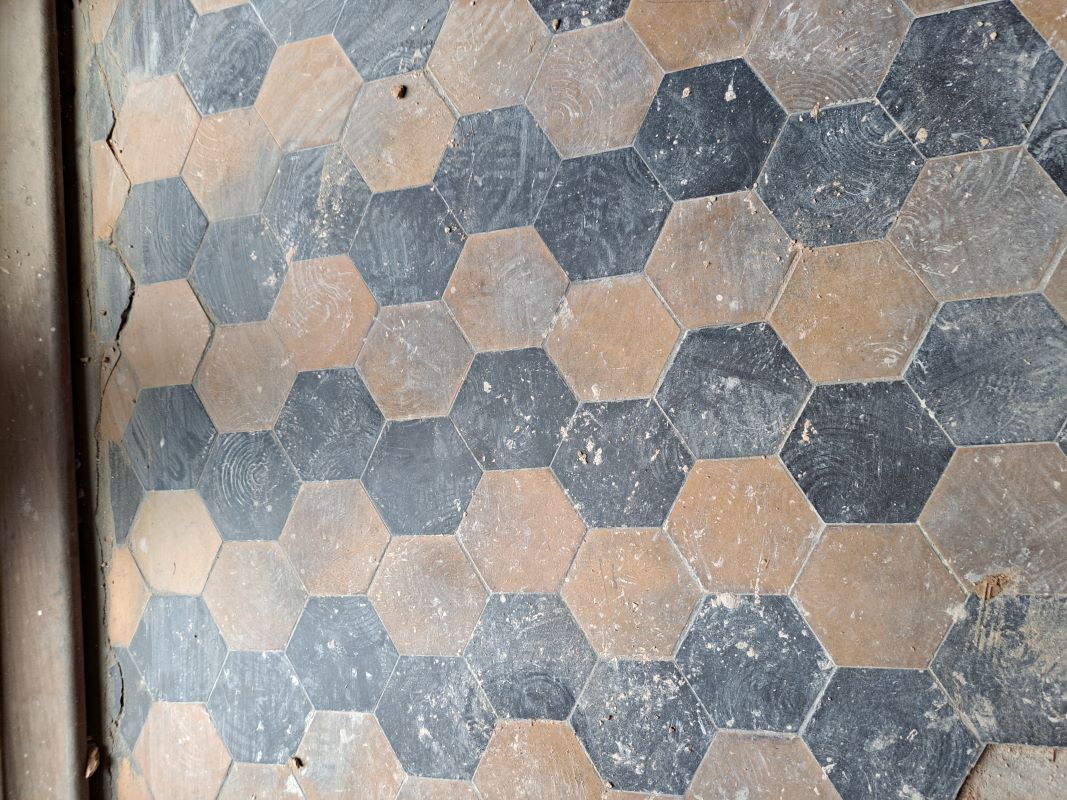
Art Deco Encaustic Tiled Floor Before Restoration Cardiff

The floor in general was in a very bad condition with builders’ plaster and cement staining in many areas, and to make things worse a lot of tiles were missing and damaged. Normally replacing tiles isn’t a problem but these particular tiles were very uncommon in colour shape and size and the pattern was very reminiscent of the Art Deco designs that were fashionable when the house was built.

Art Deco Encaustic Tiled Floor Before Restoration Cardiff Art Deco Encaustic Tiled Floor Before Restoration Cardiff

Having surveyed the floor I came up with a restoration plan and explained that it should be possible cut the shape out of a larger tile and try to match the colour as best as possible. Once the clients and I decided on the closest colour I was then able to plan the restoration project in detail and provide an accurate quote.

Cleaning and Repairing an Art Deco Encaustic Tiled Floor

Before we could even contemplate cleaning the floor it had to be whole so the 1st job was to prepare the damaged areas for tile replacements. This involves carefully removing the damaged tile and cleaning up the foundation beneath ready to accept a replacement.

Next step was to cut all the replacement tiles to replicate the octagonal shape and size then dry fit them to check if any adjustments were needed. Once all the replacement tiles had been cut, they were fixed in place with flexible adhesive and then grouted. The floor then needed time to set before cleaning so that was it for the first day.

On day two work stated to deep clean the encaustic tiled floor of previous sealers and paint. To do this it was covered in a strong dilution of Tile Doctor Pro-Clean combined with Tile Doctor Nanotech HBU Remover for extra power. This was left to soak into the floor for a good fifteen minutes before scrubbing it by hand with a black scrubbing pad cut to size. Working it into the floor like this is less aggressive than with a machine and ensures 100% coverage with no gaps in the cleaning. Once done the floor was rinsed and the soiling extracted with a wet vacuum.

The next stage was to clean the floor working at 1 m2 at a time, again with a coarse black pad cut from a 17″ Tile Doctor pad. This time the pad was used to work in Tile Doctor Grout Clean-up into the surface to remove the cement smears. As work progressed the floor was rinsed with fresh water and all the residues vacuumed away. Working this way allowed me to keep progressing until I was satisfied the whole floor was clear and as clean as it ever could be.

The floor was then left for two days so it would be completely dry for the next step of applying a protective sealer.

Sealing an Art Deco Encaustic Tiled Floor

The client wanted a natural matt finish to the floor, so I had recommended sealing it with Tile Doctor Colour Grow which is a colour enhancing impregnating sealer that leaves a very durable matt finish.

Colour Glow allows for vapour transmission which is essential on old floors like this one that don’t have a damp proof membrane. The sealer soaks into the pores of the cement tile protecting it from within and ensure dirt remains on the surface where it can be easily cleaned away.
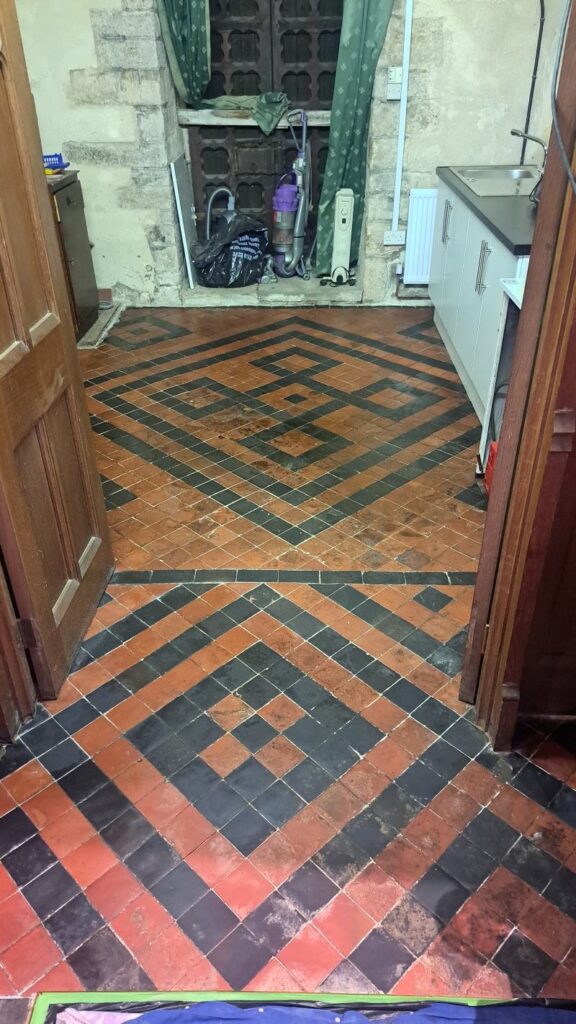
Art Deco Encaustic Tiled Floor After Restoration Cardiff

The clients were delighted with the results and relieved I was able to restore the floor as an original feature. They were told by other contractors that the floor would have to be removed and replaced at a substantial cost.

For aftercare cleaning I advised the use of Tile Doctor Neutral Tile Cleaner which is a mild yet effective tile cleaner that won’t impact the sealer.


Professional Restoration of an Art Deco Encaustic Cement Tiled Floor in Southeast Wales

Damaged Art Deco Encaustic Cement Tiled Floor Fully Restored in Cardiff Read More »

Tiled Pathway Restoration Pontcanna Cardiff

Old Quarry Tiled Pathway Restoration in Pontcanna Cardiff

Tile Doctor was contacted by a homeowner from the Pontcanna area of Cardiff about the Quarry tiled path leading up to their property. A local tile restoration company had told them that their pathway was beyond repair and had advised replacing it with new tiles at significant cost. I’m based in Cardiff and cover Southeast Wales so the enquiry was past along to myself.

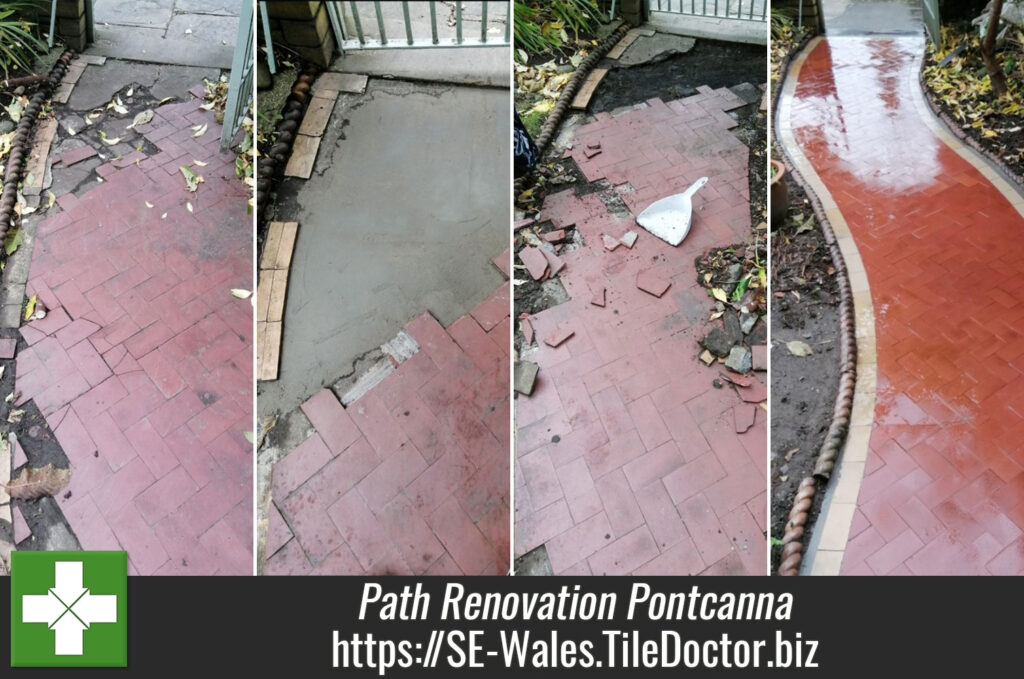
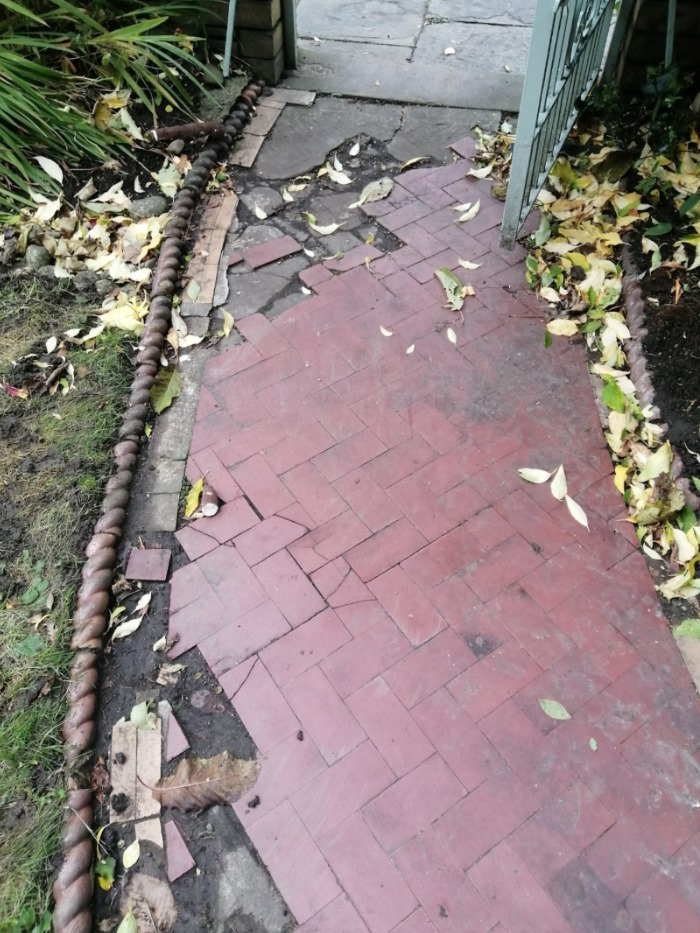
Tiled Pathway Before Restoration Pontcanna Cardiff

I contacted the client and arranged a survey which confirmed the pathway was indeed in a very poor condition. Lots of tiles were missing or cracked all of which would need replacing and some of the exposed concrete foundation would also need work.

I assured the client that I could make it look respectable again without spending a fortune. They were more than happy with my affordable restoration plan and accepted the quote. Work like this is best done during dry weather so we waited until there was a good weather window before starting.

Repairing a Quarry Tiled Path in Cardiff

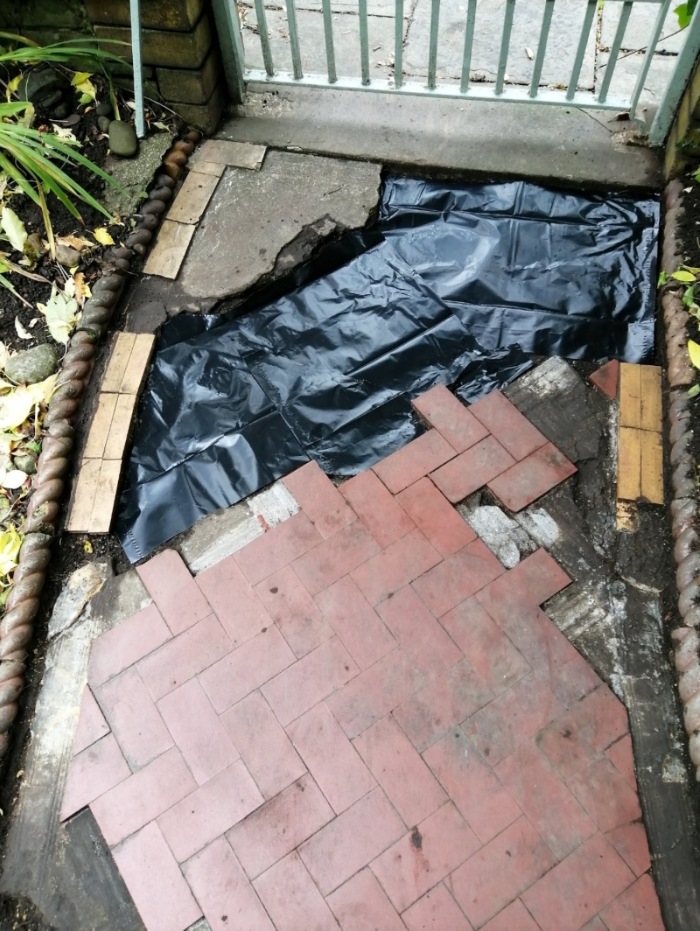
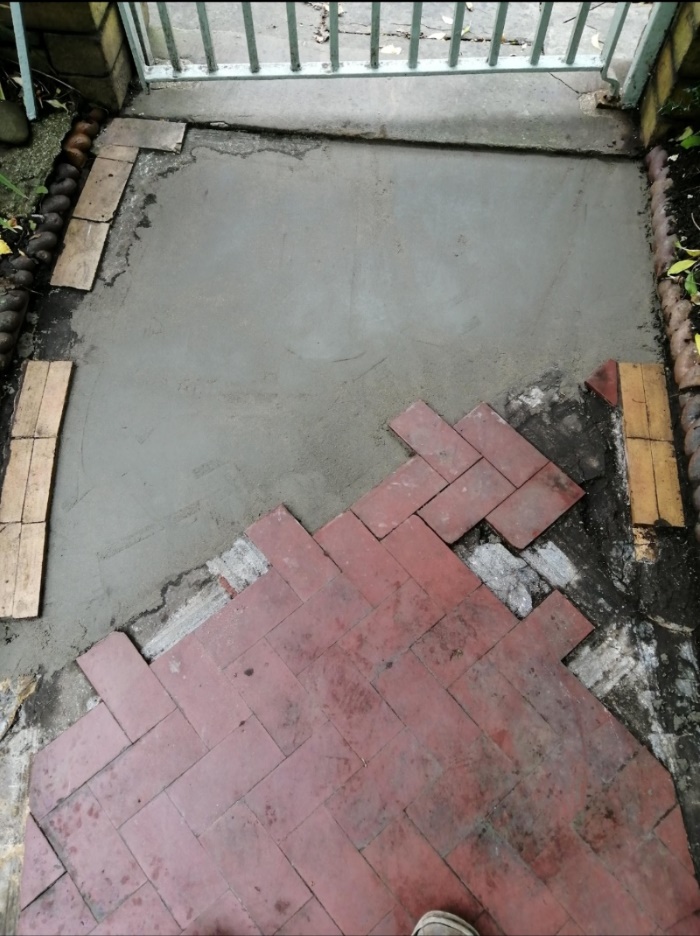
The first task was to carry out the large number of repairs and replacements including breaking the damaged sections of concrete foundation. The various areas were then cleaned up and the foundation rebuilt where necessary.

Tiled Pathway During Restoration Pontcanna Cardiff Tiled Pathway During Restoration Pontcanna Cardiff

Once the foundation had set, work started on the tiling using new similar colour tiles along the borders and main path that I was able to source before starting work. The whole pathway was then grouted in using a durable cementitious filler.

Once the new tiles had set firmly and grout hardened, I started the cleaning process.

Deep Cleaning a Quarry Tiled Path in Cardiff

Working from the front door as it’s on a slope to the street pavement I applied a mixture of Tile Doctor Pro-Clean combined 50:50 with Tile Doctor Nanotech HBU to the tiles and allowed it to soak in. After about fifteen minutes the solution was worked into the tiles one square metre at a time by hand using a coarse black pad cut from a 17-inch pad. Once the pathway was cleaned, I rinsed the whole area with clean water and extracted the waste using a wet vacuum.

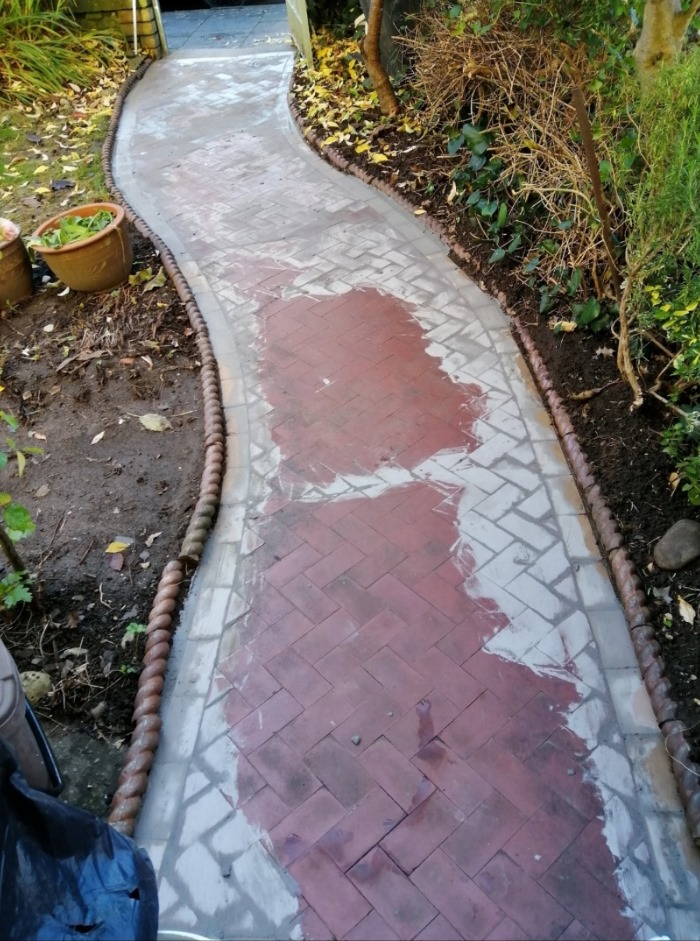
Tiled Pathway During Restoration Pontcanna Cardiff

The next stage was to rinse the pathway with neat Tile Doctor Grout Clean-up. This is scrubbed in to remove old cement, some of which must have been 100 years old. Once done the soiling was extracted and the path was given a final rinse with water.

Sealing a Tiled Pathway

The final stage was to seal the pathway tiles. Fortunately, we had a dry spell for a week or two otherwise I would have had to wait for a weather window to ensure the tiles were dry before sealing. Applying sealer to damp external tiles will lock in the moisture which would then freeze over winter causing it to expand and disrupt the sealer.

Once the floor had time to dry for a couple of days it was checked for moisture and proved within the limits to take a sealer. The chosen Sealer was Tile Doctor Colour Grow which is a very durable sealer as it’s an impregnator, meaning it soaks into the body of the tile preventing dirt from residing there.

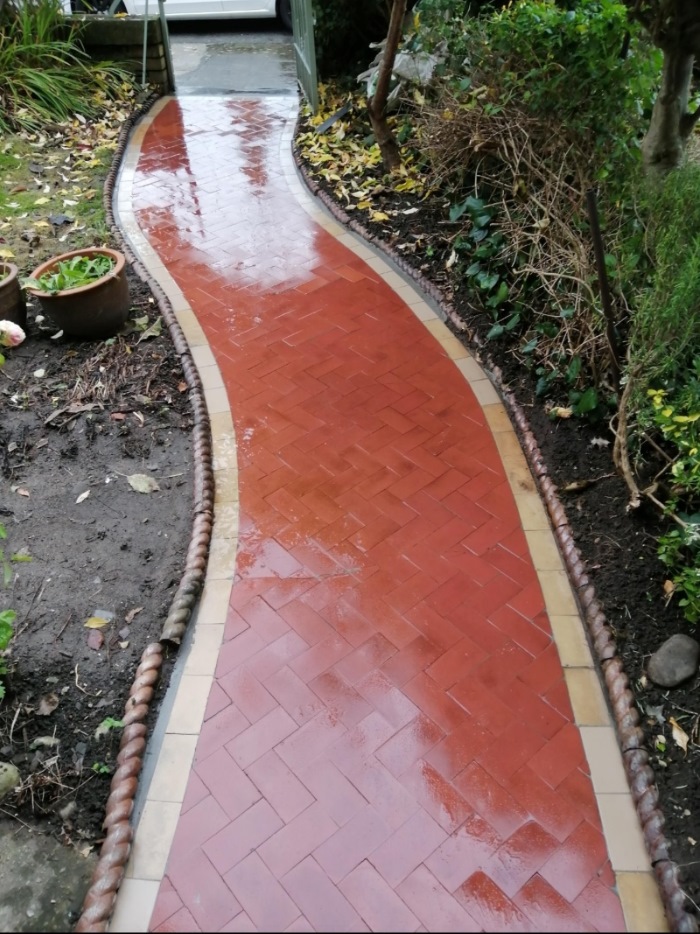
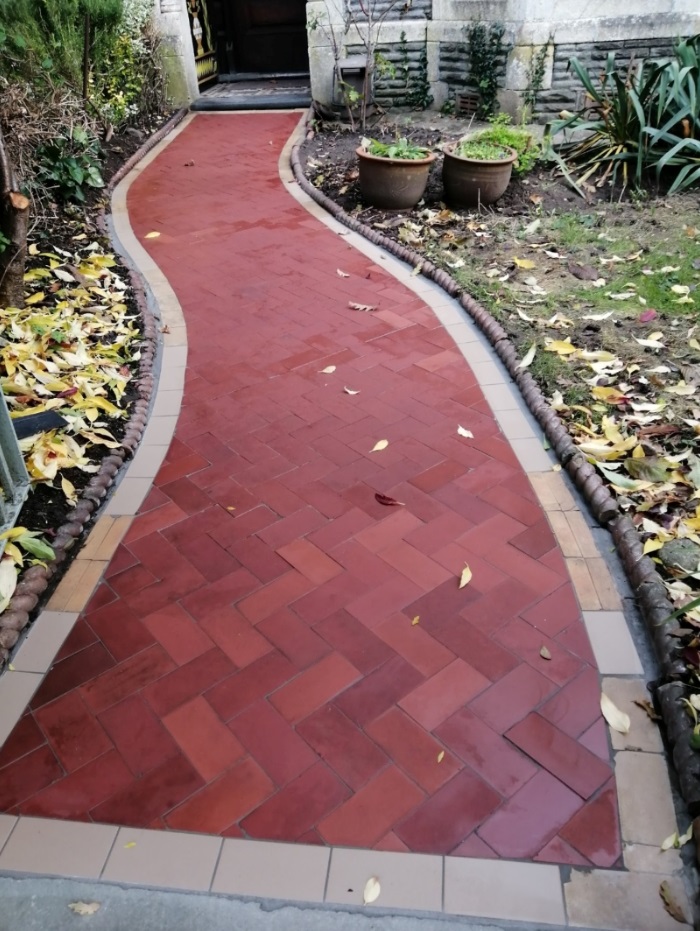
Tiled Pathway After Restoration Pontcanna Cardiff

As you can once complete the path looked fantastic and the colour enhancing formula in the sealer highlighted the vibrant reds in the tile bringing the whole project to life. The client was delighted and recommended Tile Doctor to many friends, family and neighbours in the street.

Tiled Pathway After Restoration Pontcanna Cardiff


Professional Restoration of a Quarry Tiled Path in Cardiff

Old Quarry Tiled Pathway Restoration in Pontcanna Cardiff Read More »

Scroll to Top